If you are wondering how to winter-proof your garden, we’ll present simple-to-follow steps you can implement in Autumn to ready your garden for winter!
The days are getting shorter, the leaves are beginning to change color, and the first frost is approaching – sure signs that you should be winterizing your garden.
If you prepare the plants in the garden or on the balcony well for the winter in autumn, you are laying the foundation for a green and blooming start in the coming spring.
7 Simple Steps To Make Your Garden Winter-Proof
1. Making The Lawn Winter-Proof
Giving the lawn enough space to breathe over the winter is crucial if you want it to be lush green and flourish next spring. Tree leaves and other grass material should be completely removed for this purpose. By doing this, the lawn will receive adequate light and air over the winter, which we’ll discuss in more detail to follow.
Collect the leaves and pile them up in a peaceful area of the garden. Such a pile of leaves makes the perfect winter refuge for hedgehogs and other garden residents!
Using leaves and grass clippings, it is also possible to make a compost pile. This is subsequently transformed over time by worms and microorganisms into humus, which is full of nutrients.
However, you should be aware that the right combination is essential for a good compost heap. Not all tree species are appropriate, and many leaves contain very little nutritional value. The compost heap’s location must be open ground that isn’t enclosed and should be partially shaded.
When preparing your garden for weathering the winter, keep this information in mind so that you can enjoy some fresh soil for next year in the spring.
Artificial grass is a fantastic option if you are tired of maintaining your lawn. Without mowing, scarifying, fertilizing, and of course watering, you can have a lovely, lush green front yard. Everything you need to know about artificial turf is outlined here.
2. Covering Against Frost And Preparing Plants For The Winter
In addition to being able to pile up the foliage as a shelter for animals, it can also be used as a natural frost protection for beds. Because of this, it is acceptable to leave leaves in the bed for the winter and just remove them in the spring. The leaves that have been removed from the lawn can, of course, also be used if there aren’t enough leaves in the beds.
On the other hand, brushwood should be utilized if there are not enough leaves to cover the beds. In theory, it is not necessary to dig up beds before winter. There is enough here to handle it in the spring.
3. Cut Back Flowers, Perennials, And Shrubs
It is best to remove old, sick, or leafless sections of plants before the first frost. You can even prune the plants further, depending on the type. Both times, the trimming is done to prevent the plant from wasting energy over the winter on maintaining the unhealthy parts. This offers the plants more energy to resprout in the spring.
Plant the early bloomers before the first frost if you want to be able to enjoy flowering plants as soon as possible in the new year. Hyacinths, daffodils, crocuses, tulips, and snowdrops are a few examples of them.
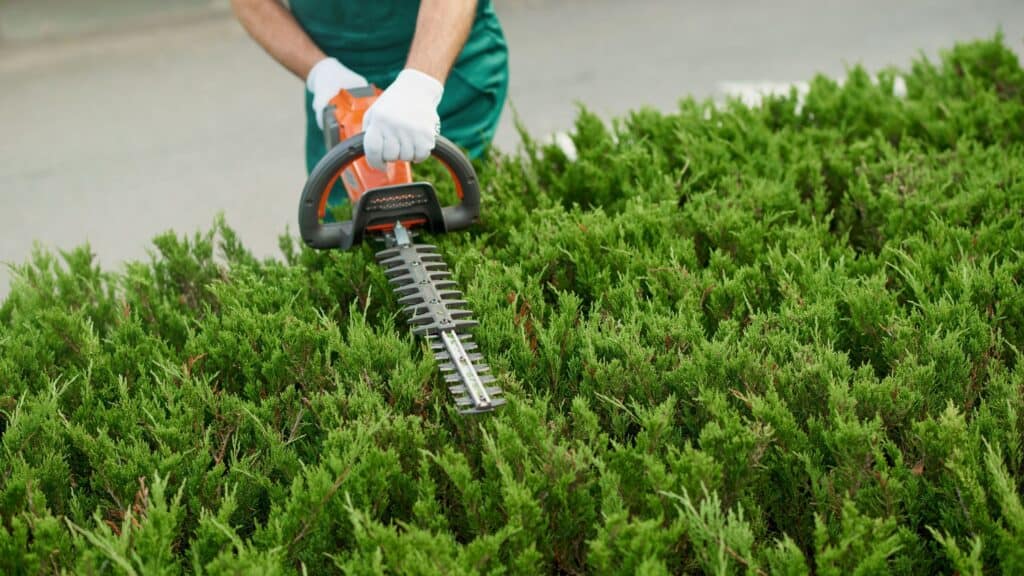
4. Cut Back Bushes, Hedges, And Trees
Hedge trimmers or pruning shears are hauled out as the next stage in making a garden winter-proof. Long sprouts must be supported during this process, and diseased and dead tree limbs must be pruned back. Here, it’s crucial to prepare for the first frost since the resulting sliced surfaces need to be able to seal themselves off once more.
Otherwise, anyone trimming their hedge should be sure to do it in a trapezoidal pattern, narrowing from the bottom up. As a result, the sprouts that are near the ground can also receive enough light. Additionally, the hedge keeps its shape even when there is a lot of snow covering it.
5. Pack Balcony Plants For Winter
Frost protection is also required for balcony plants. Placing the plants in the basement for the winter is the simplest technique to make balcony plants winter-proof. To allow the plants to stay outside as long as possible, this should be done as close as feasible to the first frost.
The plants should be thoroughly checked for bugs before being moved into the basement because else they might spread throughout the house.
If you don’t have a basement, try to keep the plants as frost-free as you can. To achieve this, arrange the plants as close as possible to a sturdy house wall, cover them with straw or pine twigs, and wrap the tubs in fleece or bubble wrap.
It’s important to keep in mind that plants require frequent watering throughout the winter as well. You can use hardy balcony plants and enjoy the vibrant splashes of color all winter long to keep your balcony from looking so bleak.
6. Making The Outside Water Tap Winter-Proof
You should also make the outdoor water tap winter-proof. The water line to the outside water tap should be switched off. The tap should first be opened in order to prevent any water still in the pipes from freezing and, as a result, to prevent pipes from leaking.
The entirety of water bottles and watering cans should also be emptied. The drain taps on the former can be left open, while the latter is best stored indoors. Pond pumps’ inlets and outputs must be emptied and turned off. After that, they spend the winter in frost-free storage.
7. Putting Garden Furniture Away For The Winter
If you’re making the garden winter-proof, all garden furniture, including tablecloths and seat cushions, should be stored over the cold season. This should be the case, regardless of whether it’s constructed of materials that are resistant to the elements, such as poly rattan, aluminum, or wood.
This is best done in dry, cold areas like basements, garages, or garden sheds. During the winter, only steel furniture is recommended for the garden. If you don’t have enough room inside, you might use specialized protective covers to store your furniture. The following steps should be taken:
- The outdoor furniture should be cleaned, then dried
- Secure protective coverings firmly, taking wind into account
- Make sure that the furniture can receive air in order to avoid the growth of mold