Are you tired of that unsightly tree stump in your garden? Well, here’s a brilliant idea to change it into something extraordinary—a captivating planter box bursting with vibrant flowers. So, let your imagination soar as we explore the wonderful possibilities of how to make a tree stump planter.
Repurposing the stump not only adds charm to your garden but also brings other practical benefits. As the wood gradually decays, it enriches the soil with valuable nutrients, ensuring your plants thrive.
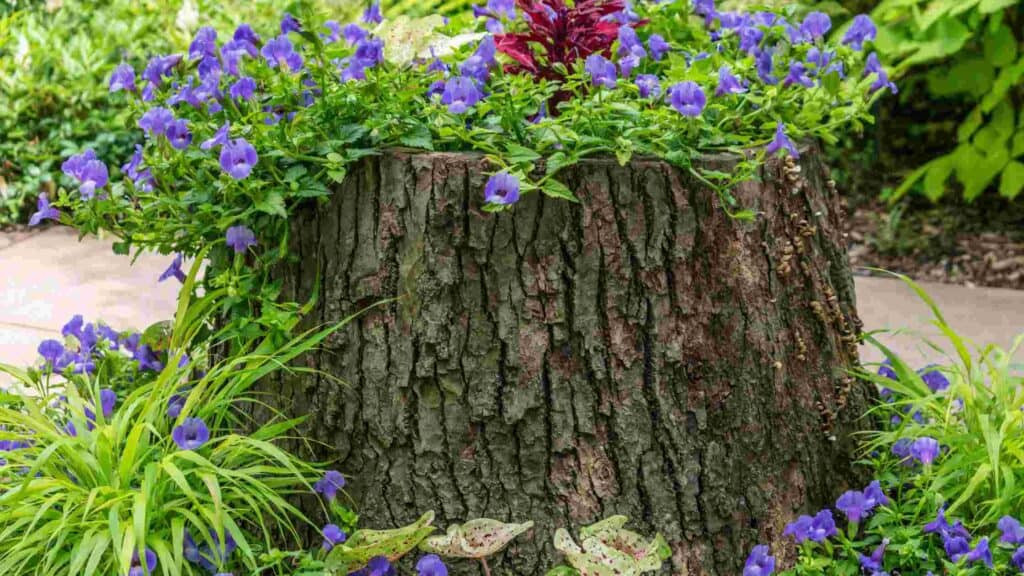
How To Make A Tree Stump Planter: Step-By-Step Process
1. Preparation: What Tools Do You Need To Hollow Out A Tree Stump?
Ensure your safety as you embark on this creative venture. Wear protective gear, including safety glasses, to shield your eyes from flying wood chips.
Use the sharpened pointed end of a pick or an ax to chip away at the stump and hollow out a planting bowl.
2. Begin The Work: How Do You Hollow Out A Tree Stump For A Planter?
Transition to the wider end of the ax as you enlarge the hollowed area. Proceed towards the perimeter of the stump and create a hole that is 4 to 8 inches deep, ensuring a minimum border of 3 inches.
3. Ensuring Proper Drainage
To prevent potential issues like root rot caused by excessive moisture, create drainage holes on the side of the trunk. The holes should slant toward the ground.
Use an auger bit that is ⅜ to ½ inch for this task. These drainage holes not only promote the longevity of the stump but also help your plants thrive.
4. Adding The Finishing Touches
Now it’s time to fill your newly created planting hole with the right materials and blooms.
Begin by adding free-draining material, such as gravel, to the bottom. Then, top it off with a mixture of 70% potting soil and 30% compost.
Finally, plant some eye-popping, colorful blooms that will make your tree stump planter a true showstopper.
Tree Stump Planter Ideas: How To Plant Flowers In A Tree Stump
If you’re a DIY enthusiast, there are countless ways to bring your tree stump ideas to life (here are some ideas on how to preserve a tree stump).
The most common method involves creating a hollow stump planter, where you have the option to directly plant into the stump itself.
Hollowing out the planting bowl requires a few sharp tools, including a wood chisel, splitting ax, battery-powered electric drill, hammer, safety glasses, and gloves.
Let your creativity flourish as you explore various options for utilizing tree stumps in your yard.
Here are some inspiring ideas to spark your imagination:
- Enchanting Fairy Grotto: Transform a small, seemingly plain stump into a magical fairy grotto that will captivate and entertain kids for hours.
- Triple Stump Haven: Convert each cut portion of a twisted triple stump into a spacious planting hole for an array of vibrant flowers.
- Artistic Fusion: Combine natural and artificial elements by sanding down and staining the trunk with a glossy finish, resulting in a unique and visually striking feature.
- Nature’s Color Palette: Utilize a substantial, overgrown tree stump to display a diverse range of plant life, adding a natural burst of color to your garden.
- Sleek and Sophisticated: Embrace the smooth surface of newly stripped stumps to create an elegant planter that can be easily rearranged to achieve the perfect aesthetic.
Choosing The Perfect Flowers
When it comes to selecting flowers and plants for your tree stump planter, the possibilities are endless. Splash vibrant colors with nasturtiums, petunias, marigolds, wildflowers, and pansies.
Opt for lush ferns to enhance the foliage or incorporate stunning succulents. Let your personal taste and style guide your choices.
Alternative Approach: Standing Pots On Top

If digging a planting hole isn’t your preferred method, you can simply place pots above the tree stump. To create a magical ambiance during nighttime, consider adding mood lighting for an enchanting view.
FAQs – How To Make A Stump Planter
1. How do you make a tree log planter?
To make a tree log planter, first, choose a suitable log and cut it to the desired length.
Hollow out the center of the log, leaving enough space for soil and plants. Drill drainage holes in the bottom, add potting soil and plant your desired flowers or plants.
2. How to hollow out a stump with a chainsaw?
To hollow out a stump with a chainsaw, mark the desired shape and depth of the hollow on the stump.
Make several cuts along the marked lines using the chainsaw, then use a chisel, pry bar, or ax to remove the cut sections and hollow out the stump.
Exercise caution and wear appropriate safety gear when using a chainsaw.
3. What are some large tree stump planter ideas?
Some large tree stump planter ideas include creating multiple planting pockets on the surface of the stump, carving out intricate designs or patterns, or using the natural hollows or crevices of the stump as unique planting areas.
You can also incorporate cascading plants or vines to create a visually appealing arrangement.
4. How to create a fake tree stump planter?
To create a fake tree stump planter, you can use materials such as concrete, fiberglass, or foam to sculpt and shape the stump-like structure.
Paint or texture the surface to resemble a real DIY wood stump planter. Ensure the planter has proper drainage holes and use artificial plants or flowers for a maintenance-free option.
5. How to make a tree stump flower pot?
To make a tree stump flower pot, choose a small or medium-sized stump and hollow out the center to create a planting space.
Ensure the stump has proper drainage holes by drilling or carving them. Fill the hollowed-out area with potting soil and plant your desired flowers or plants, providing regular care and watering as needed.
Conclusion: How To Make A Planter Out Of A Tree Stump
Don’t let that tree stump go to waste! Embrace the opportunity to create a remarkable tree stump planter that will breathe new life into your garden.
With a little creativity and the right tools, you can transform an eyesore into a captivating focal point bursting with vibrant colors and lush foliage.
So, let your imagination run wild and embark on this exciting DIY project that will surely impress both you and your guests.